
Share
Published 11:48 19 May 2017 BST
 Add us as a preferred source on Google »
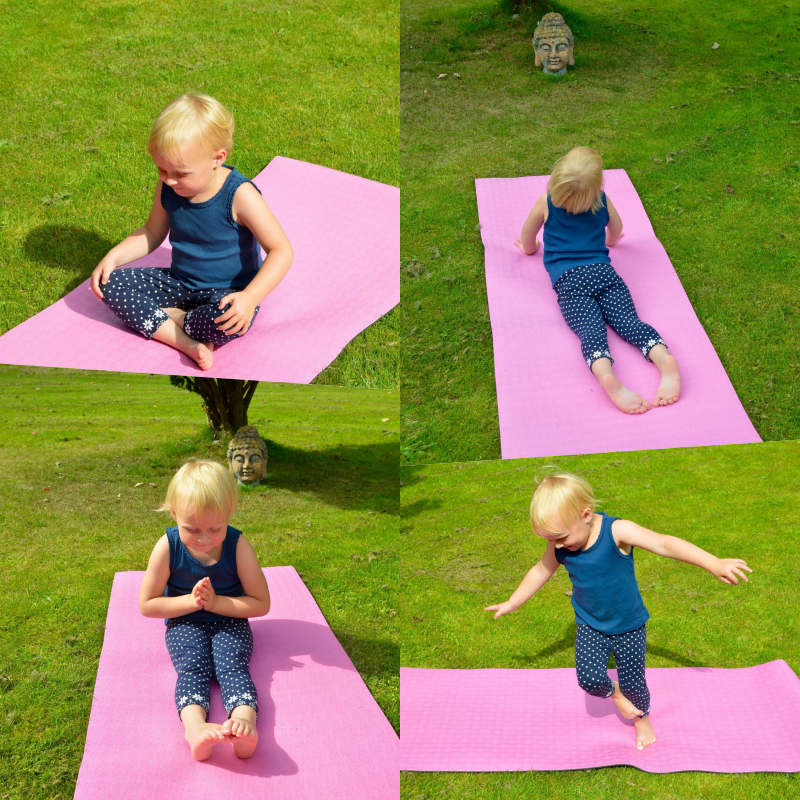 Our shared yoga sessions are beautiful moments that I treasure, but yoga has also been shown to improve children's focus and relieve anxiety. On a physical level, yoga improves posture, flexibility and prevents 'growing pains' that tweens can experience.
We like to practice after school, to ease the tensions of the day, but it's best not to practice it too late in the evening as this can interfere with sleep patterns.
These classic yoga positions can all be adapted for children:
1. Tree Pose (Vrksasana)
Our shared yoga sessions are beautiful moments that I treasure, but yoga has also been shown to improve children's focus and relieve anxiety. On a physical level, yoga improves posture, flexibility and prevents 'growing pains' that tweens can experience.
We like to practice after school, to ease the tensions of the day, but it's best not to practice it too late in the evening as this can interfere with sleep patterns.
These classic yoga positions can all be adapted for children:
1. Tree Pose (Vrksasana)
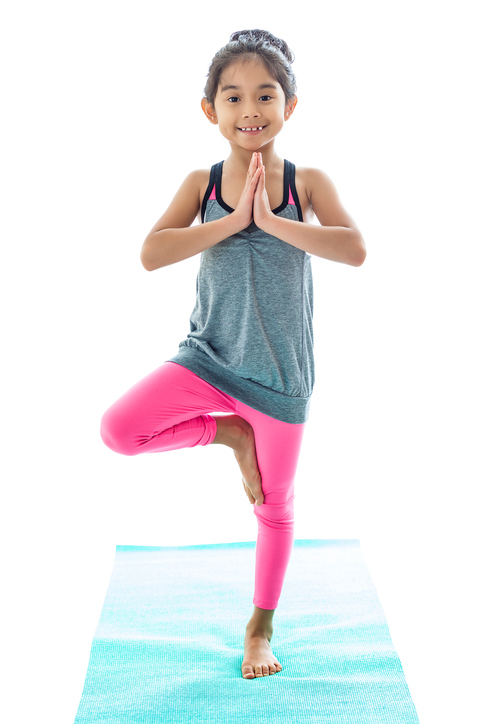 1. Begin by standing upright with your arms at your sides. Distribute your weight evenly across both feet, grounding down equally through your inner ankles, outer ankles, big toes, and baby toes.
2. Shift your weight to your left foot. Bend your right knee, then reach down and clasp your right inner ankle. Use your hand to draw your right foot alongside your inner left thigh. Do not rest your foot against your knee, only above or below it. Adjust your position so the center of your pelvis is directly over your left foot. Then, adjust your hips so your right hip and left hip are aligned.
3. Rest your hands on your hips and lengthen your tailbone toward the floor. Then, press your palms together in prayer position at your chest, with your thumbs resting on your breastbone.
4. Fix your gaze gently on one point in front of you. Draw down through your left foot. Press your right foot into your left thigh, while pressing your thigh equally against your foot.
5. Inhale as you extend your arms overhead, reaching your fingertips to the sky. Rotate your palms inward to face each other. If your shoulders are more flexible, you can press your palms together in prayer position, overhead.
6. Hold for up to one minute. Repeat for the same amount of time on the opposite side.
Cobra Pose (Bhujangasana)
1. Begin by standing upright with your arms at your sides. Distribute your weight evenly across both feet, grounding down equally through your inner ankles, outer ankles, big toes, and baby toes.
2. Shift your weight to your left foot. Bend your right knee, then reach down and clasp your right inner ankle. Use your hand to draw your right foot alongside your inner left thigh. Do not rest your foot against your knee, only above or below it. Adjust your position so the center of your pelvis is directly over your left foot. Then, adjust your hips so your right hip and left hip are aligned.
3. Rest your hands on your hips and lengthen your tailbone toward the floor. Then, press your palms together in prayer position at your chest, with your thumbs resting on your breastbone.
4. Fix your gaze gently on one point in front of you. Draw down through your left foot. Press your right foot into your left thigh, while pressing your thigh equally against your foot.
5. Inhale as you extend your arms overhead, reaching your fingertips to the sky. Rotate your palms inward to face each other. If your shoulders are more flexible, you can press your palms together in prayer position, overhead.
6. Hold for up to one minute. Repeat for the same amount of time on the opposite side.
Cobra Pose (Bhujangasana)
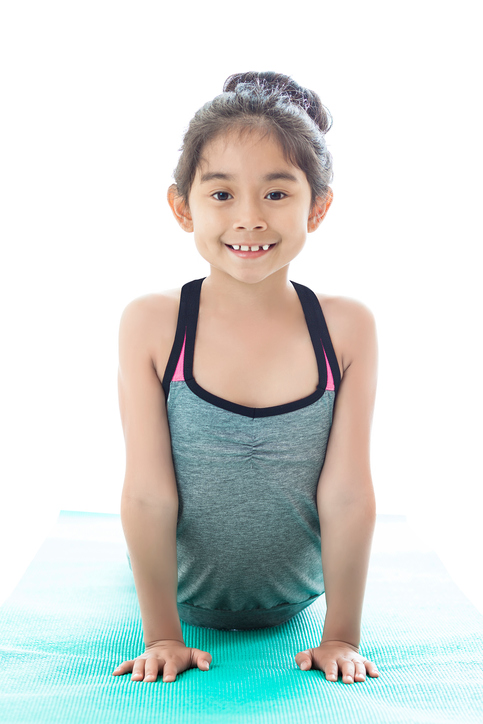 1. Lie on your belly, with your chin on the floor, palms flat on the floor under the shoulders, and legs together.
2. Without using the arms, inhale and lift the head and chest off of the floor, keeping the neck in line with the spine.
3. With your elbows close to your sides, press down into the palms and use the arms to lift you up even higher. Drop the shoulders down and back and press the chest forward.
4. Breathe and hold for 2-6 breaths.
5. To release: exhale and slowly lower the chest and head to the floor. Turn the head to one side and rest, rock the hips from side to side to release any tension in the low back.
King Dancer Pose (Natarajasana)
1. Lie on your belly, with your chin on the floor, palms flat on the floor under the shoulders, and legs together.
2. Without using the arms, inhale and lift the head and chest off of the floor, keeping the neck in line with the spine.
3. With your elbows close to your sides, press down into the palms and use the arms to lift you up even higher. Drop the shoulders down and back and press the chest forward.
4. Breathe and hold for 2-6 breaths.
5. To release: exhale and slowly lower the chest and head to the floor. Turn the head to one side and rest, rock the hips from side to side to release any tension in the low back.
King Dancer Pose (Natarajasana)
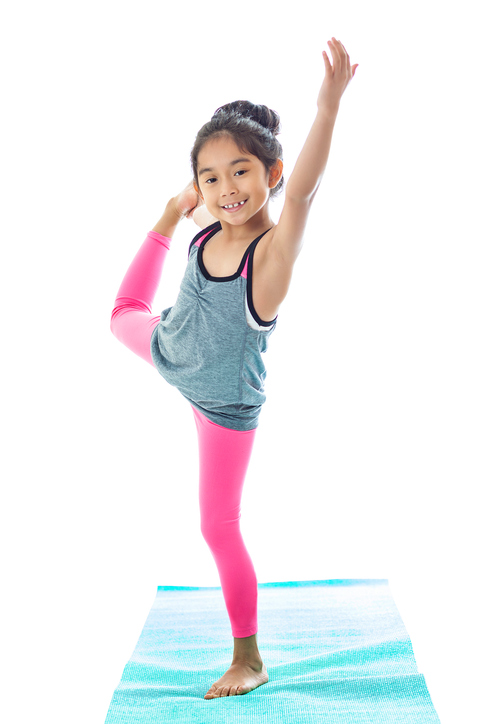 1. Begin by standing upright with your arms at your sides.
2. Bend your right leg back and hold on to the inside of your foot behind you with your right hand.
3. Inhale and stretch your left arm up towards the ceiling.
4. Exhale and extend through the right side of your body. Bend forward at the hips and take your right foot back, pressing your foot into your hand. Your left arm should now be in front of you.
5. On your next exhale, bend your hips further down until your torso is parallel to the floor. Extend your right leg to the sky. Extend through the back of your neck as you gaze straight ahead.
6. Hold the pose for 4 or 5 breaths, then release and repeat on the other side.
Butterfly Pose (Baddha Konasana)
1. Begin by standing upright with your arms at your sides.
2. Bend your right leg back and hold on to the inside of your foot behind you with your right hand.
3. Inhale and stretch your left arm up towards the ceiling.
4. Exhale and extend through the right side of your body. Bend forward at the hips and take your right foot back, pressing your foot into your hand. Your left arm should now be in front of you.
5. On your next exhale, bend your hips further down until your torso is parallel to the floor. Extend your right leg to the sky. Extend through the back of your neck as you gaze straight ahead.
6. Hold the pose for 4 or 5 breaths, then release and repeat on the other side.
Butterfly Pose (Baddha Konasana)
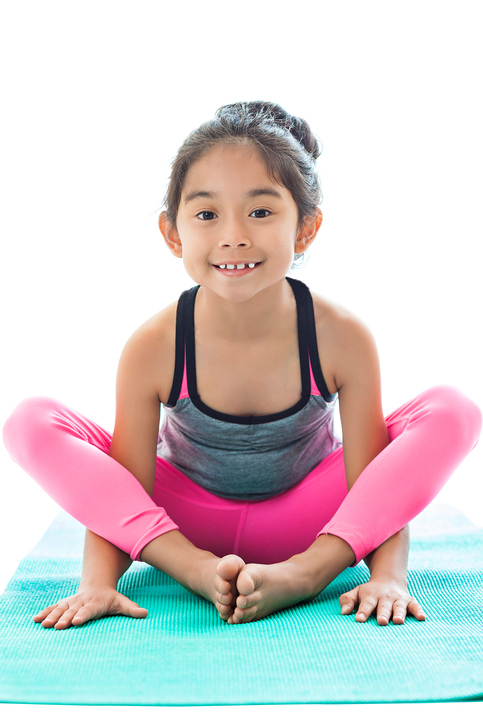 1. Start by sitting with your legs stretched out in front of you.
2. On an exhalation, bend your knees and bring the soles of your feet together to touch. Bring your heels as close to your pelvis as you can without feeling pressure or pain in your knees. Push the outer edges of your feet firmly into the floor and wrap your hands around your feet or ankles.
3. With the pelvis in a neutral position, begin to gently work the outer knees towards the floor. Never force your knees down.
4. Stay here, or start to recline your torso forward, ensuring that your spine remains long and neutral by bending from the hip joints as opposed to the waistline.
5. To exit the pose, draw your knees towards one another, and extend your legs back out in front of you.
1. Start by sitting with your legs stretched out in front of you.
2. On an exhalation, bend your knees and bring the soles of your feet together to touch. Bring your heels as close to your pelvis as you can without feeling pressure or pain in your knees. Push the outer edges of your feet firmly into the floor and wrap your hands around your feet or ankles.
3. With the pelvis in a neutral position, begin to gently work the outer knees towards the floor. Never force your knees down.
4. Stay here, or start to recline your torso forward, ensuring that your spine remains long and neutral by bending from the hip joints as opposed to the waistline.
5. To exit the pose, draw your knees towards one another, and extend your legs back out in front of you.Explore more on these topics: