
Share
Published 09:00 20 Mar 2021 GMT
Updated 12:01 20 Mar 2021 GMT
 Add us as a preferred source on Google »
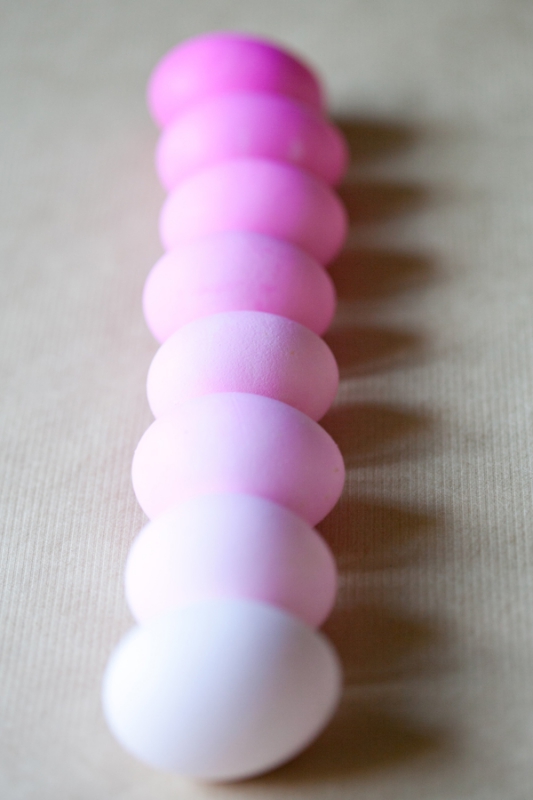 2. Typography Easter Eggs
Typography is all sorts of hot, and I personally can't wait to decorate my Easter brunch table with these!
Materials
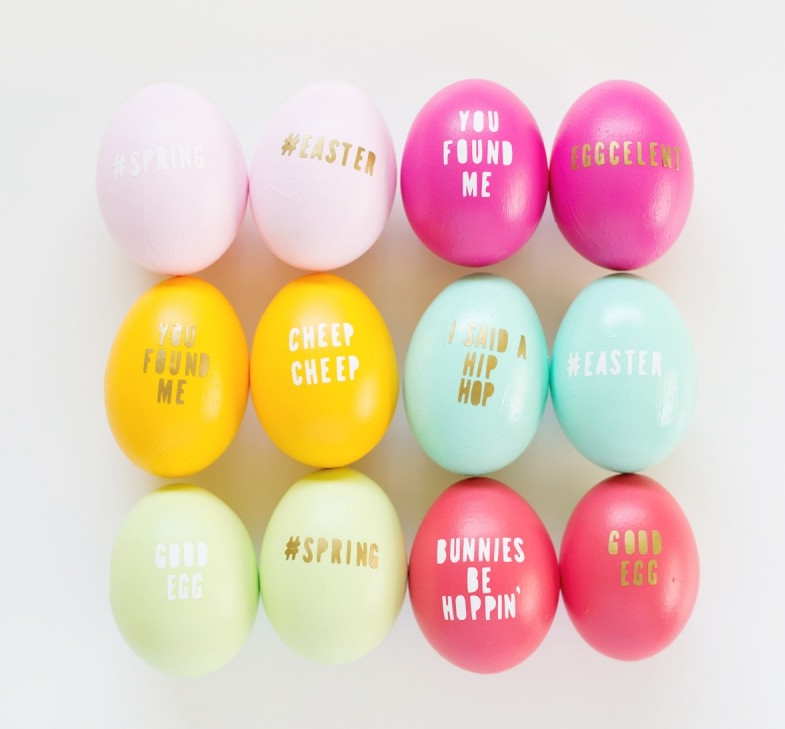
2. Typography Easter Eggs
Typography is all sorts of hot, and I personally can't wait to decorate my Easter brunch table with these!
Materials
 3. Gold and Glitter Easter Eggs
If you, like me, go weak at the knees for a little glitter, these eggs are your boo.
What you need
. eggs
. food colouring
. gold size
. gold foil
. glitter
. kraft glue
. acrylic paint
. paint brush
. a couple of old bowls
What to do
Step 1: Boil eggs with vinegar to prevent cracking. If you want to keep the eggs for ever you will need to pin prick a raw egg on both ends and blow the yolk out of it, then let it dry outside.
Step 2: Pop a little food colouring in a bowl with enough water to cover the eggs you want stained. This lady used a pinky red colour and immersed the eggs overnight, then took them out and let them dry on some paper. The overall colour comes out all patchy and almost watercoloured.
Step 3: In a bowl add some glitter and with the wet painted egg use the paint as a ‘glue’ and roll the egg very gently in the glitter and sprinkle more on the spots that are not covered. Gently set aside in a bowl or on newspaper. Make sure the egg is completely covered or any exposed paint will stick to the newspaper or bowl and rip off when you move it later.
Step 4: Grab the glue and pop spots or any pattern you like over the food coloured egg or a plain egg or a white egg. There are no rules. Your imagination can go wild.
Step 5: Sprinkle glitter gently over the egg and let the glitter stick to the parts where you applied the glue. I LOVE the idea of messy glitter dots. If you want to be a bit neater with things use a finer grain of glitter. It will stick easier to the glue and the excess will just glide off. Thicker glitter tends to stick around and is a lot messier.
Step 6: Grab the gold size and apply it to your food coloured eggs. You can either cover the entire egg to have a solid gold coloured egg, or use your hand to just apply in spots, you will need a small little bowl with a little gold size in it so that the egg can sit for a few minutes before applying the gold foil.
Step 7: With clean dry hands, apply the gold foil to the egg. Gold foil is super delicate. Coat the egg in the foil with your finger and let the excess land on a dry clean space for the next egg. Let all the eggs dry for a couple of hours in a clean dry bowl.
(Images and idea via Bellamumma.com)
3. Gold and Glitter Easter Eggs
If you, like me, go weak at the knees for a little glitter, these eggs are your boo.
What you need
. eggs
. food colouring
. gold size
. gold foil
. glitter
. kraft glue
. acrylic paint
. paint brush
. a couple of old bowls
What to do
Step 1: Boil eggs with vinegar to prevent cracking. If you want to keep the eggs for ever you will need to pin prick a raw egg on both ends and blow the yolk out of it, then let it dry outside.
Step 2: Pop a little food colouring in a bowl with enough water to cover the eggs you want stained. This lady used a pinky red colour and immersed the eggs overnight, then took them out and let them dry on some paper. The overall colour comes out all patchy and almost watercoloured.
Step 3: In a bowl add some glitter and with the wet painted egg use the paint as a ‘glue’ and roll the egg very gently in the glitter and sprinkle more on the spots that are not covered. Gently set aside in a bowl or on newspaper. Make sure the egg is completely covered or any exposed paint will stick to the newspaper or bowl and rip off when you move it later.
Step 4: Grab the glue and pop spots or any pattern you like over the food coloured egg or a plain egg or a white egg. There are no rules. Your imagination can go wild.
Step 5: Sprinkle glitter gently over the egg and let the glitter stick to the parts where you applied the glue. I LOVE the idea of messy glitter dots. If you want to be a bit neater with things use a finer grain of glitter. It will stick easier to the glue and the excess will just glide off. Thicker glitter tends to stick around and is a lot messier.
Step 6: Grab the gold size and apply it to your food coloured eggs. You can either cover the entire egg to have a solid gold coloured egg, or use your hand to just apply in spots, you will need a small little bowl with a little gold size in it so that the egg can sit for a few minutes before applying the gold foil.
Step 7: With clean dry hands, apply the gold foil to the egg. Gold foil is super delicate. Coat the egg in the foil with your finger and let the excess land on a dry clean space for the next egg. Let all the eggs dry for a couple of hours in a clean dry bowl.
(Images and idea via Bellamumma.com)
